
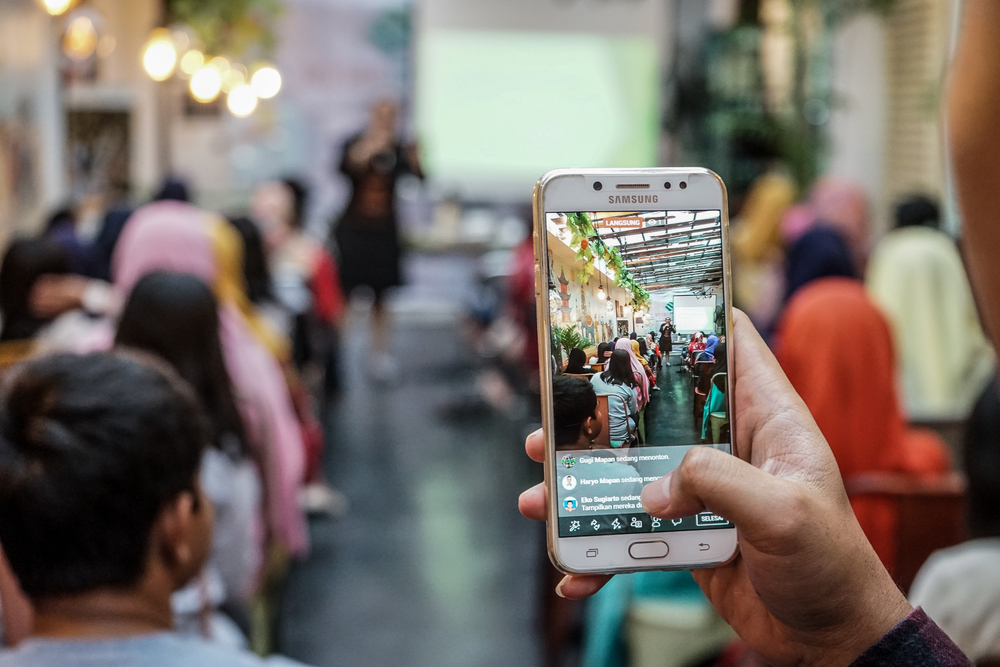
Everything You Need to Know About Facebook Live
Since 2016, Facebook offers live video streaming for both personal accounts and business pages. For the latter, this broadcasting service can be a very interesting way to share content differently.
Provided you do it properly. Let’s see what that means!
Why make a live Facebook?
For businesses, Facebook Live is a communication channel that allows them not only to share information, news or events in an original way, but also to humanize the page. By putting forward a face that speaks directly to subscribers, you get closer to your target audience. It builds more authentic relationships, if not intimate.
In addition, Facebook Live allows subscribers to engage in direct conversation and give them the chance to ask questions or share their emotions. In short, it brings people together under one interface.
How to make a live Facebook?
First of all, it is necessary to distinguish mobile and computer operation.
On mobile
First, note that Facebook Live for business pages is done via the Facebook Pages Manager application, which is linked to your Facebook Business Manager account, and not directly in Facebook.
So, to start a live broadcast, you must open Pages Manager, choose the page concerned, press “Publish” and choose “Live Video”.
TIP
If you want to run some tests before you go live, it is recommended that you create a private professional page (which only you can see). So you can do all the tests you want without damaging the reputation of your real page.
Then, you have to allow Facebook to access to your microphone and camera. You can then add a description (which must be precise and catchy), geolocalize, add a filter (this is not always a good idea…!) and choose the audience. For this last option, you have the choice of age, sex and places.
Once you’re satisfied with your settings, just press “Start Live Video” and you’re live!
On computer
If, however, you want to do a more elaborate and professional live, it’s with the computer that you should do it. Why is that? Simply because you can connect one (or several) camera and one (or several) better quality microphone. But the operation is a little more complex.
First of all, to broadcast from your computer, you will need to have previously downloaded a third application specially dedicated to lives. The most popular, for its simplicity and no fees, is OBS Studio.
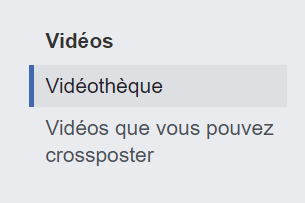
When it is downloaded, you have to go to your Business Manager to get the Stream Key that will link your stream to Facebook. To achieve this, the following steps must be taken: Publishing Tools > Video Library > + Live.


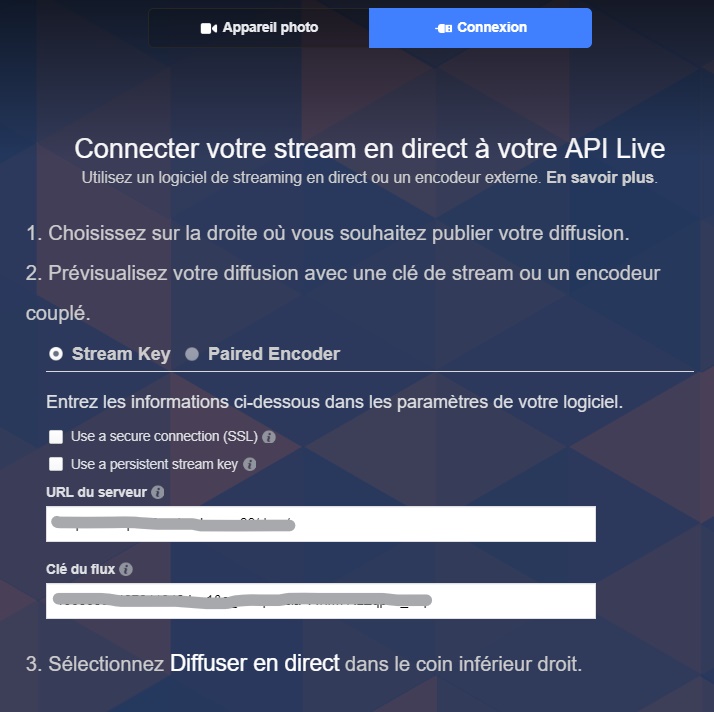
Then copy and paste the stream key into OBS : File > Settings > Stream. And choose the “Facebook Live” service.
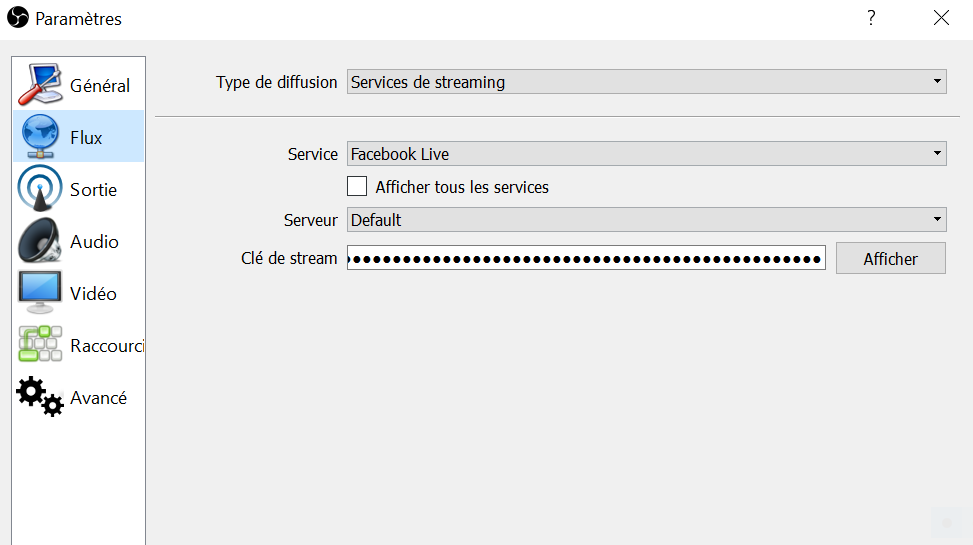
Also make sure you have selected your audio and video sources (i.e. you have previously connected your cameras and microphones to your computer).
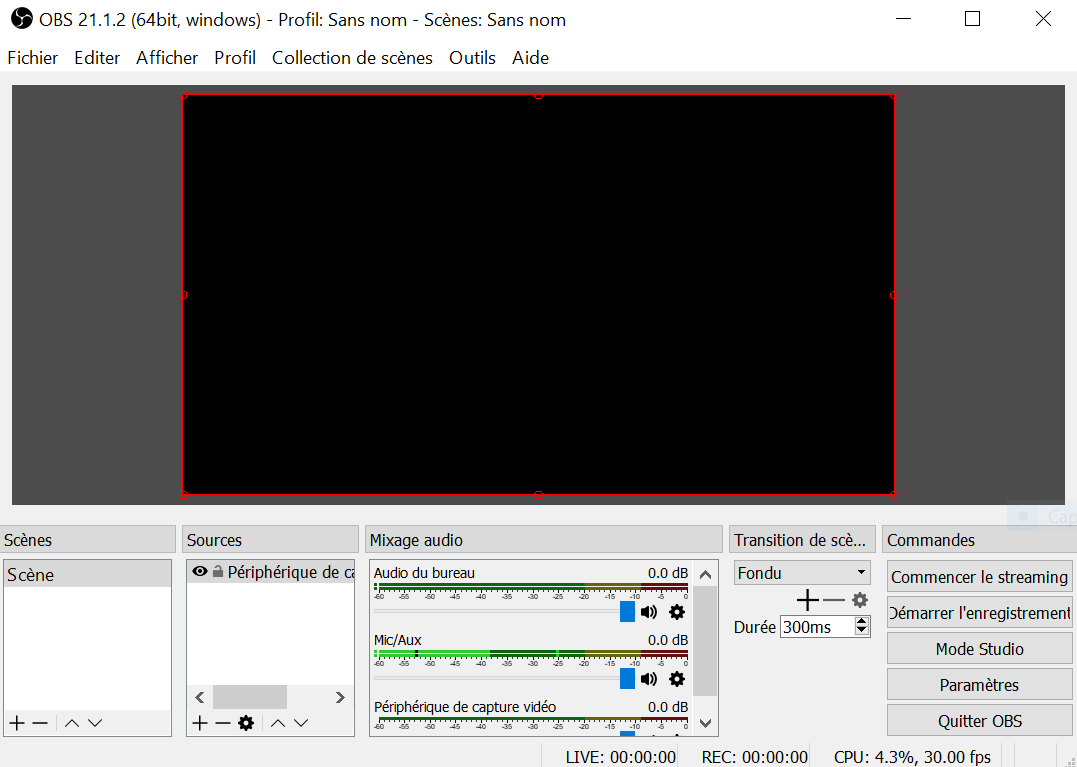
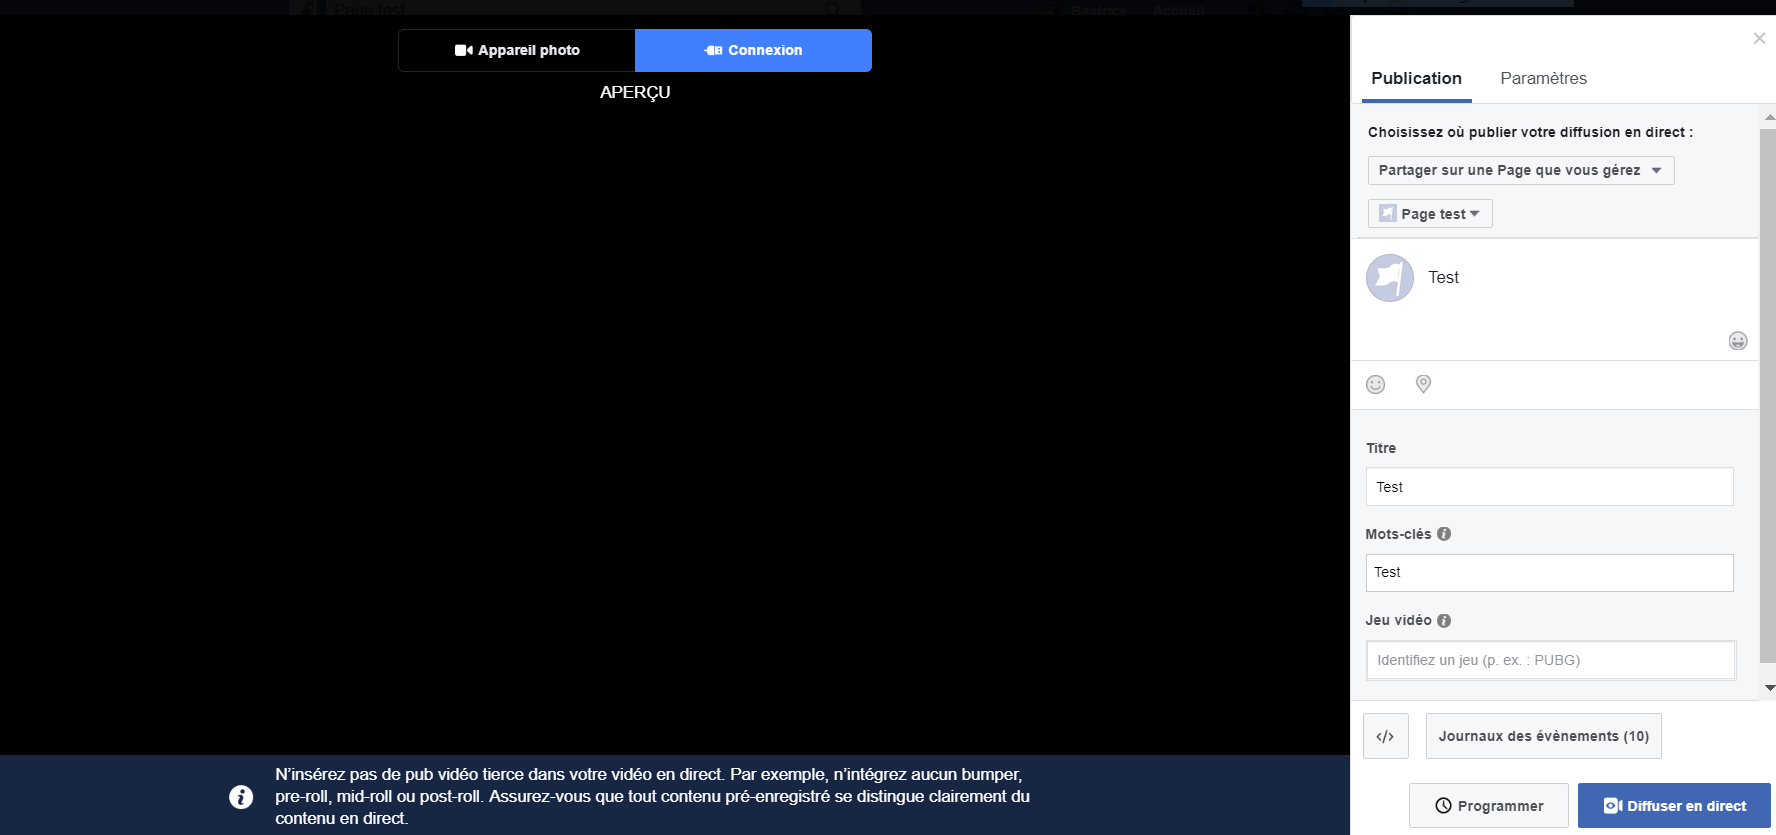
Then you can click on “Start streaming”. Then go back to your Facebook page, you will see the text “Fetching video stream” and a few seconds later you should be connected.
NOTE: there is between 5 and 10 seconds delay between reality and stream.
Once your visual and sound look good, you can add your description and keywords and you’re ready, all you have to do is click on “Broadcast live”!
TIP
It is possible to block viewers that you consider inappropriate: simply press the profile picture displayed next to a comment and press “Block”.
And then what?
Your live is over, you are satisfied, your community is happy: here is a successful live. But what happens once it’s all over? Was it ephemeral?
Luckily, no! Your live video will always be available on your page and in your video library, for to analyze the statistics.
The statistics
As with any other video, it is possible to view your live performance statistics: viewing times, number of unique viewers, number of views, average viewing time, engagement, etc.
You can even analyze the evolution of your video by clicking on each indicator. You will then know which minute your live was the most popular.
Our recommendations
Now that you know how to make a live Facebook video from a technical point of view, all you need are the best practices to refine your video.
Here are the most important ones, according to us:
- Announce your live one day in advance. You create an appointment with your community, in addition to generating interest.
- Be sure to write a catchy description for your live. Subscribers should be encouraged to join! Do something simple, enticing and evocative.
- Have an unbreakable Internet connection! We even recommend a cable connection, rather than wifi, when possible. This is not the time to let down your subscribers with a flickering video.
- Prepare questions and answers in advance to make up for the lack of spectator participation. If your goal is to question your audience, but the audience is shy, this step is very important in order to avoid uncomfortable silences on the screen.
- Respond to viewers’ comments live, personalizing the response with the person’s name. A great way to humanize the discourse and involve your community.
- Remind viewers to subscribe (with the “Subscribe” button). By doing this, subscribers will receive notifications the next time you do a live video.
- Be live for more than 10 minutes, but no more than 90 minutes. To stay relevant and keep subscribers interested, it is better to be concise!
- Make sure viewers know when the live broadcast ends with a closing sentence (for example, “Thanks for watching!”). So they don’t think your stream was cut off unexpectedly.
Armed with these few tips, quality material, creativity and professionalism, you will be able to broadcast a wonderful live Facebook that will please your community!
Happy broadcasting 🙂