
Organizing a photo shoot in 8 easy steps
When you work in marketing and social media, you are often called upon to promote a product. And to do this, images are always the best way to convey an emotion, to bring the product to life in a dynamic and appealing way.
But what happens when your client doesn’t have a well stocked bank with photos of his product, or simply when you want to take the art direction elsewhere? You have to do a shooting, of course!
Having recently done it for a brand new customer, the Pisse-Dru wine, I now share with you the necessary steps for a successful photo shoot.
Here, the image is at the service of your visibility, your brand image, your professionalism. It should also be remembered that product photos are the most effective content on social media with a 60% engagement rate for the 200 largest brands in the world. So try to do it right!
1. Determine your needs
Start a project without knowing why we are doing it? That would be foolish (or very reckless…!).
A photo shoot is an effective way to access to quality visual content that accurately respects your customers’ requests and needs. But it’s also necessary to know in advance the reasons that motivate the realization of the project.
Ask to be briefed in every detail! If, however, you are in education mode with your client, let them know how you plan to focus your session so that it meets their needs (which they may not know well).
Photos designed for social media will not have the same settings as those designed for print publishing, or even those for online advertising. Do we need rectangular formats? Vertical? Square? It’s up to you.
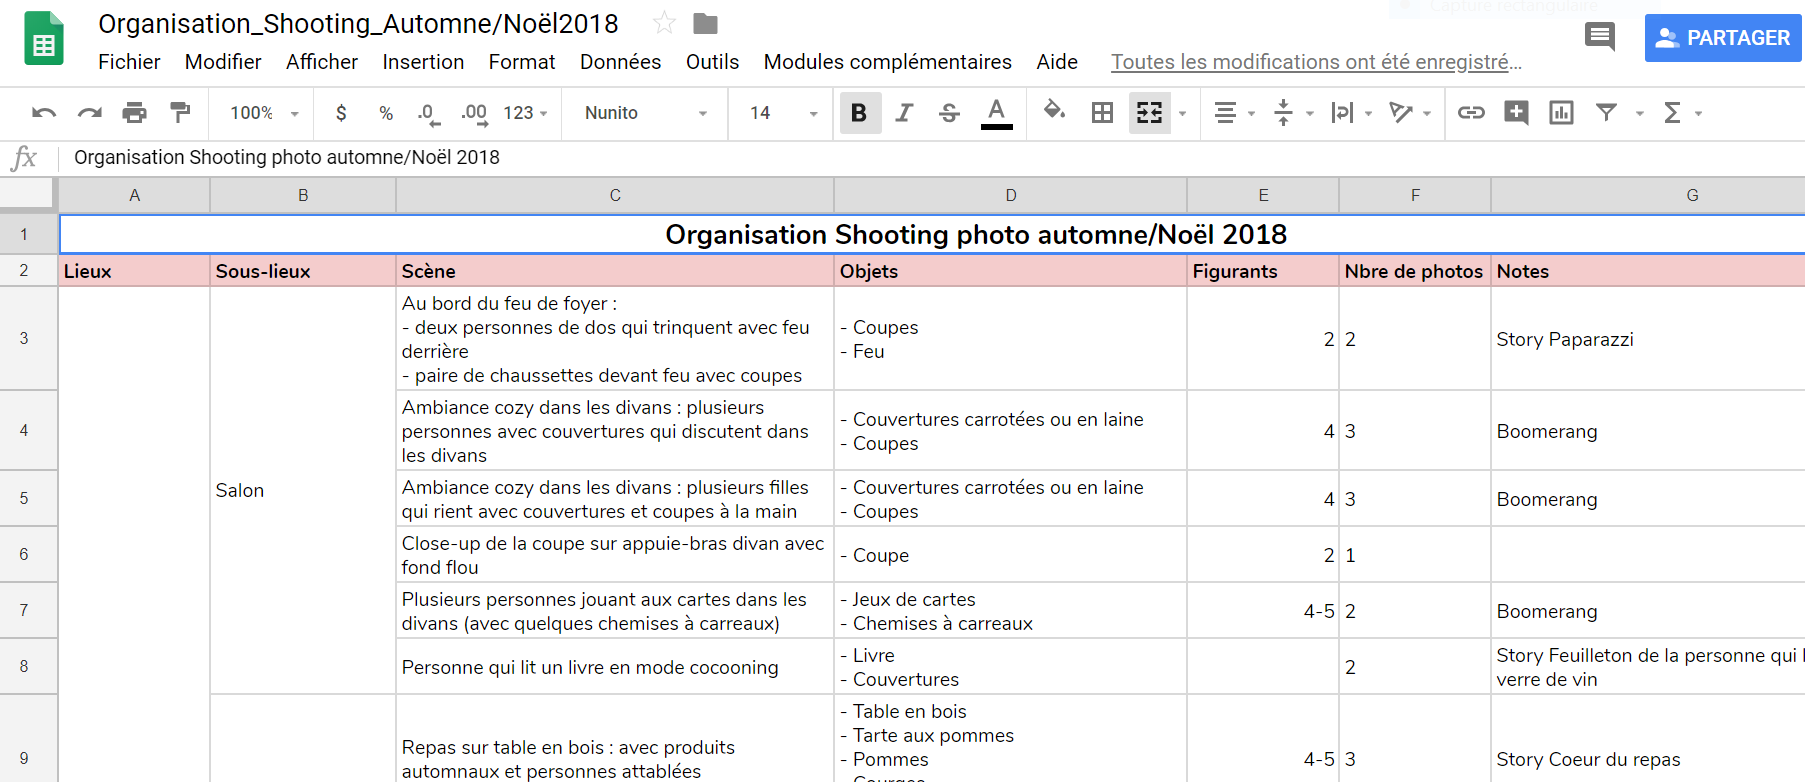
2. List the scenes
Once you know what the photos will be used for, you obviously have to think about what they will show in concrete terms. You must therefore determine the visual content of the images. Each photo must tell a story, evoke something at first sight.
And for your shooting to be effective, think about all this before the big day. Define each scene clearly: how many extras, which objects, what angles, which sets, facial expressions, etc.
TIP
If you are more visual, you can even draw the scenes and all the elements that should be there.
Make a table with all this information and during the shooting, tick the scenes already made. That way, you’ll make sure you don’t forget anything!
TIP
If the photos are for social media, also think of stories for Instagram, keeping in mind the vertical format and the often more dynamic content.
3. Choose the location(s)
This is certainly one of the most important elements in your planning. The place will impact the settings, the light, the depth effects.
If you choose an outdoor location, keep in mind that you will be subject to the hazards of Mother Nature. Conversely, if you prefer an indoor space, think about the sources of natural light you may have or, on the contrary, the need for spots.
4. Determine the day
If the place is a key actor in the success of a photo shoot, so is the time of day. It goes without saying that if you want to be illuminated by the sun, you should not start the session at 3pm on a beautiful winter day.
So choose the time of day that will give you the most beautiful rays of the sun (if that’s what you’re looking for) or the darkness of the night.
TIP
The golden hour (towards the end of the day) is a great time to take outdoor photos. The sceneries are then adorned with a soft golden colour. A natural effect that always wins!
Sometimes it can be interesting to book two half-days, rather than just one day, in order to increase the chances of good weather or exceptional sunset.
5. Think of extras
Photos with faces on Instagram received 38% more likes than other posts. This means that yes, you need photos where the product is well highlighted, but it’s preferable to also add extras in action.
In addition to humanizing the brand, the presence of individuals makes it possible to revitalize photos and contextualize them.
It’simportant to properly brief your models about the image you are looking for; what emotion do you want to bring out? Which angles will we focus on? Are we talking about close-ups or wide shots?
TIP
If you have few extras at your disposal, ask them to bring several outfits and accessories and/or to do their hair differently from one shot to another, in order to diversify the pictures.
And don’t forget the waivers!
6. Think about accessories
Thoughtful scenes, a magnificent place, a well exposed product, enthusiastic extras: all this is very beautiful, but let’s not neglect the accessories. They are the ones who will make your photo a real success by specifying the scene.
Here again, the checklist will be your best friend. Export the information you noted when designing the scenes and create a new list for accessories only.
This will allow you to know exactly what you need to buy or bring. Also, if several of you are in charge of accessories, you will be able to clearly identify who is in charge of which items.
TIP
When you are at the accessory purchase stage, remember to recall the dominant colours of your product. This creates a beautiful visual harmony!

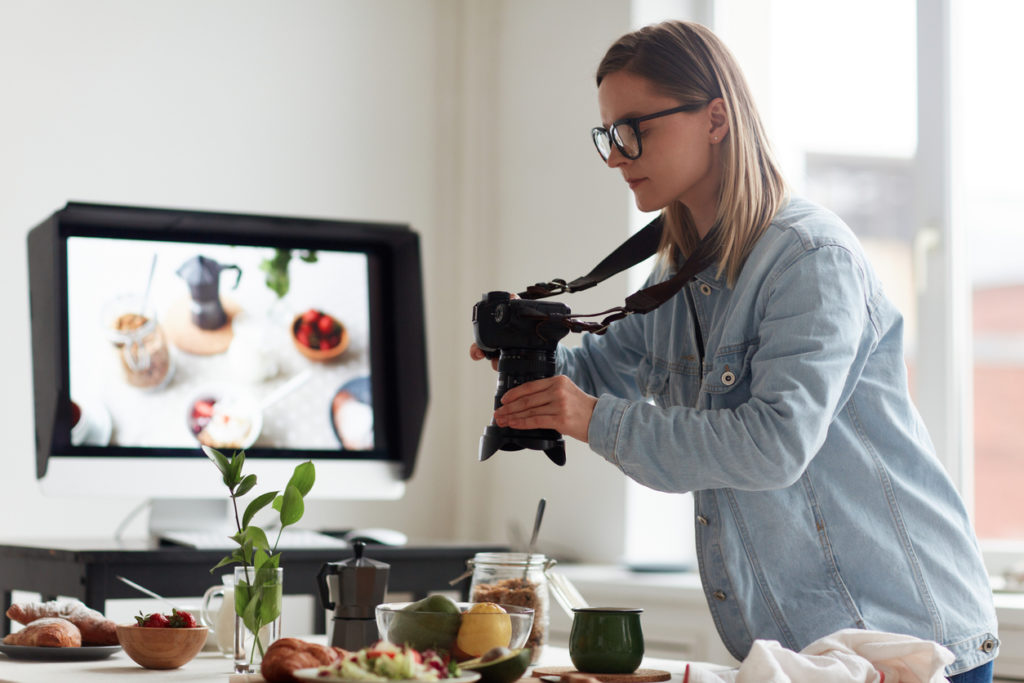
7. Choose your photographer
As he/she will be the one who will direct your shooting with his/her artistic eye, make sure to select one that will be adapted to your needs. Are you shooting for an Instagram account? Choose a photographer who knows about it (and who will think about taking more square pictures).
Also make sure that he/she has all the necessary equipment (tripod, flash, lenses, reflector, etc.).
As with any collaborator, you will also have to brief him in detail on the desired aesthetic: close-ups? Overall? Any artistic blur? The focus on products? On the atmosphere?
Everything still goes through a full brief.
TIP
While your photographer is taking the pictures, you can take behind the scene shots for your own social media or website.
8. Do the touch-ups
Once the photos are captured, time must also be allowed for retouching. Whether it’s the photographer’s task or that of an in-house employee, retouching must be uniform and respect a pre-established aesthetic.
The ideal, if it’s the photographer who’s in charge of it, is to ask him to send all the “raw” shots, in order to make a preselection and then to modify only those that please the most.

—
In short, the miracle recipe for a successful photo shoot is preparation. You have to anticipate the whole session and try to think of everything. Become omniscient!
Of course, spontaneity can be allowed to take over, but only if it does not slow down the project and is still consistent with the needs.
Enjoy your shoot! 🙂